

 This was a week of ups, and downs in our reading. We finished Kathleen Krull's Leonardo da Vinci. I'm happy to say, that after the first four chapters, the information on his sexual preferences calmed down, and I was able to read to the children with less editing. But, there was some pretty graphic information about his research involving cadavers, that the children objected to.
 I tried playing an audio version of The Magic Tree House Morning With a Mad Genius, Mary Pope Osborne's more child friendly take on the scientist/artist, to the children, but they wanted nothing to do with it. The older children have read the book before themselves, and enjoyed it, but they objected to the reading by the author. They didn't like the way she voiced characters.
 We also checked out Maxine Anderson's Amazing Leonardo da Vinci Inventions You Can Build Yourself. There are some interesting looking activities in it, but all too complicated for us this week, so we'll have to return to them later on, when we're feeling adventurous.


 Want to wow your children, with science, before breakfast (or anytime of day)? All you need is an empty, plastic bottle, with a cap, and some hot tap water.
 We learned from Paul Showers' Hear Your Heart, a "Stage 2 Let's-Read-And-Find-Out About" book, that an empty toilet paper roll makes a pretty good stethoscope.
 Of course, my youngest two, thought they needed to decorate the tubes. I suggested covering them in tissue paper. C, wanted purple, but settled for overlapping the red, and blue we had in the cupboard (which sort of gives you purple).


Hmm...
It's great to be a homeschooler (and I don't mean that in an arrogant way, it's just nice to be free from some of the same old, same old).
 E (age 5), and I were inspired by Jim Wiese's Spy Science: 40 Super Sleuthing, Code-Cracking Activities for Kids, to try our hand at some undercover art, today.


 Wiese suggests using whole milk, because it's the fat, the graphite sticks to. So, the higher the fat content, the better the experiment will work. We were happy with the success we had with 2%, though.
 We combined our afternoon snack, with a lesson in plate tectonics, thanks to an idea from Geography Crafts for Kids: 50 Cool Projects & Activities for Exploring the World by Joe Rahtigan and Heather Smith.
We popped it in the oven at 35o degrees Fahrenheit, for about 12 minutes, and I used the time to trace, and cut out rough, paper outlines of the continents.
When, the cookie was baked, and cooled, but still warm, the girls placed the continents onto it...
...to use as a guide to cut the continental plates around, labeling each plate with an edible marker, to make sure they didn't miss any. You can find a nice diagram of the continents, and plates, here, at Enchanted Learning (just page down a bit, after you click).
I trimmed the edges of the cookie, so it would fit into a 9 x13'' pan, full of our chocolate pudding, mantle.
Once in place, the older kids used a spoon to demonstrate how the the plates float, and move on top of the mantle, and we talked about continental drift.
Then, they dished out servings of the cookie plates, and pudding mantle, to their younger siblings....JPG)
...who eagerly devoured the lesson.
For more fun with geography, and history check out this week's link up, hosted by Children Grow, Children Explore, Children Learn.
It's great to be a homeschooler.

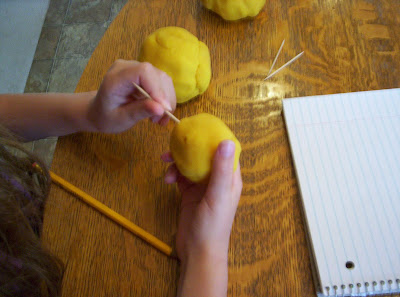
 Our boredom buster for the afternoon came from Janice Vancleave's Chemistry for Every Kid: 101 Easy Experiments that Really Work, and is actually a lesson in deductive reasoning.

 I gave the balls to the children, with a notebook, pencil, and some toothpicks. Their instructions were to try to determine what sort of toy was hidden in each ball, by poking into the play dough with the toothpicks.
 When one of them thought there was a dinosaur in the dough, they all decided there was a dinosaur in the dough. Then, after they saw what one of the toys was, they decided all the toys were that same thing. They were going with what they believed, instead of what the evidence presented.
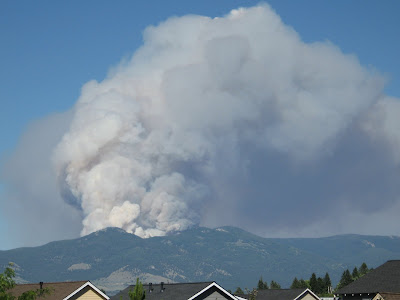
 We were rained in last night - a good thing for the forest fire, but not so good for restless children. Luckily though, we had just checked out another stack of books, full of science experiments, from the library, so we were armed with plenty to do.


 I was worried our loops were too small. They didn't seem to match Tina Holdcroft's illustrations. But, the straw flew a good 25 feet, hampered only by the size of the room. And, not only did it fly far, but it glided with surprising grace, as well.