Thursday, July 31, 2014

Summer Fun 2014 - Multi-Media Doodle Table


We often cover the table in paper for day long, open ended, doodling with crayons, or colored pencils.  Just for a change, yesterday, I added a few more mediums to the mix.

First I covered the table with a plastic backed, disposable, paper tablecloth.  Then, I marked off a bunch of cattywampus squares with painter's tape.  Finally, I dug through the craft closet, and pulled out tempera paints, water colors, pastel chalk, markers, and our usual crayons, and colored pencils.


I told the girls, that within each shape they were free to draw, or paint whatever they wanted, whether it was a picture, a series of pictures, shapes, or just color - but they could only use one medium in each marked off space.  So, if they wanted to switch from water colors to tempera paint for instance, they needed to move to a different space.


They had a great time experimenting with each medium, working away, circling the table for more than an hour.  In fact, given enough time, I'm fairly certain there would not have been a blank inch left to be seen.


The only things I might do differently next time, would be to cover the table with butcher's paper, instead of a paper table cloth, to work better with wet paints, and I might set out a greater variety of paints in lieu of the largely ignored crayons, and colored pencils.  It's more fun to experiment with a medium you don't use everyday.

Wednesday, July 30, 2014

Summer Fun 2014 - Tossing Water Balloons into Swinging Buckets


We were inspired by Anita Yasuda's Explore Space! 25 Great Projects, to try throwing water balloons into swinging buckets. 

Actually, Yasuda's book called for throwing a ball into a moving bucket, as part of an Mars mission lesson.  We dropped the lesson, added an extra bucket, switched out the ball for a batch of water balloons, and ended up with a great summertime challenge.

To play, simply hang one bucket  per child, or team, from a swing-set, tree branch, or overhang.  We looped a long jump rope through the handles of the buckets, and the hooks on our swing-set to hang ours.

Give the children water balloons (as many as you can stand to fill).


Set the buckets swinging.


And, instruct the children to throw as many water balloons into their respective buckets as possible.


When all the balloons are gone, check the water level in the buckets.


The one with the most water in their bucket is the winner.


Tuesday, July 29, 2014

Summer Fun 2014 - Magnet Powered Car


Tape a refrigerator magnet to the back of a toy car.  Hold another magnet up to the first, so that like poles are facing each other, and allow the repelling force to push the car along, without ever touching it yourself.


This simple, but entertaining, and easily expandable project, along with 49 other intriguing ideas, with short blurbs explaining the science behind them, can be found in Bobby Mercer's Junk Drawer Physics:  50 Awesome Experiments That Don't Cost a Thing...


...which, as it happens, can be downloaded for free as part of Amazon's Kindle Unlimited Program - a program we are happily trying out for free for 30 days.  I'm not sure yet, if I like the subscription program, but I can easily recommend Mercer's book.  It's well organized, full of interesting projects, many of which we haven't seen before, and contains just enough science to pique our curiosity (and no, I'm not on Mercer's payroll).

Monday, July 28, 2014

Social Studies Unschool-Style

When it comes the easiest subjects to unschool, I'd have to say social studies and history top the list.  You can't turn around without bumping into them.  And, in this age of electronic media, so much of history is ready to play out in our living rooms, with just the click of a mouse.

This morning for instance, T(age 16) was up before the others, and plopped down next to me on the couch just as I was turning on the computer to catch up on the morning's news.

Paging through the headlines on AOL led us into an article on North Korea threatening the a nuclear strike against the White House and Pentagon, which contained the following quote from Hwang Pyong-So, director of the North Korean military's General Political Bureau:

"If the US imperialists threaten our sovereignty and survival... our troops will fire our nuclear-armed rockets at the White House and the Pentagon - the sources of all evil."

T was taken back by the harshness of the rhetoric.  I reminded him that it hasn't been that long since our own president was calling the Soviet Union the "Evil Empire".  On a whim I googled "Reagan's evil empire speach", and we spent the next half hour watching it.


It's an amazing speech, if you haven't ever watched the entire thing, I'd encourage it. It's hard to imagine how our philosophy of government could have changed so much in the short time since it was made.  Of course, that thought led us to a clip of presidential candidate Bill Clinton on the Arsenio Hall Show in 1992...


...and, in fairness to the man, a quick clip of a more grown-up post-presidential Clinton on Fox News.


Then, just for fun we clicked a side video, and joined Robin Williams for a look forward, and look back at the beginning of the Obama presidency.


Which led us nicely back into today's headlines:

"Robin Williams Checks Into Rehab For Continued Sobriety"

By which time, the others were up, and ready for breakfast.

Sunday, July 27, 2014

Summer Fun 2014 - Sink or Float? Sugared Ice-Cubes


I mentioned the other day that we had done a quick "sink or float" soda pop density experiment, to fulfill the final challenge for our library's summer reading program.  It was a simple - toss cans of diet, and sugared soda into a sink filled with water...


...to see which ones will sink, and which will float type of experiment.  Naturally, the diet soda floats, while the sugared soda sinks.


Actually, my children were more interested in the way the refracting light made the cans appear to shrink into mini-cans, in the water.  Since, it went along so nicely with the color video we had watched to go with our Kandinsky cookies, I let them play for a while...


...before bringing their attention back to the ingredient list on the sides of the cans.  All the cans of soda weighed the same, but they were not all the same when it came to their ingredients.  The sugar in the regular pop increases the density of the liquid, causing those cans to sink.  We also discovered not all diet soda is created equal.  The diet root beer did not have any sugar, but it had an amazing amount of salt, and not surprisingly it didn't float quite as well as the diet Coke (or at least it didn't appear to at the time).

The idea that the density of the liquid inside of a closed can of soda can have more to do with whether the can will sink, or float, than the weight of the can, can be hard to wrap your mind around.  I wanted to be sure the younger children were really getting what was happening, so I prepared a second experiment...


...by filling, and freezing an ice-cube tray, filled half with plain water, and half with sugar dissolved in boiling water to as close to the saturation point as I could take it.


Once the ice was frozen, I plopped one of the plain cubes into a glass of water, and asked the girls if they knew why it floated.  They more or less remembered, that water becomes less dense as it freezes (you can find a more complete explanation, here), which I thought was good enough for an 8 and 9 year old.


I plopped in a sugared ice-cube, and asked the surprised girls why they though it sank, and watched the "light bulb" go on, as I asked them if they remembered why the can of regular soda didn't float, when they diet soda did.

"Sugar!" they yelled, and then, of course, "Can we taste it?"


It's great to be a homeschooler.

Saturday, July 26, 2014

Summer Fun 2014 - Singing Tubes on the Vacuum Cleaner


Have you ever just held a singing tube up to the hose of your vacuum cleaner, while it was running?  It's more interesting than you might think.


We found ours only made noise if we held them straight out.  Adding more tubes increased the volume, but did not change the tone.  The tone could be changed, and played with by slightly tilting, or swirling one tube into another.


The inside of our vacuum hose is ribbed just like the sound tubes, except that the ribs are pressed closer together.  After a little experimenting, we realized our vacuum hose sings too, if it's stretched straight out.  Fortunately we almost never stretch it out that way while vacuuming, and even if we happened to, the little whistle it makes is very quiet, proving there's more science involved in our everyday chores, than we sometimes realize.

For more fun with sound tubes, or to find out what they are, you might want to check out our singing tube stomp rockets...


...or singing tube science experiments.


It's great to be a homeschooler.

Friday, July 25, 2014

Summer Fun 2014 - Ice and Magnets


With warmer weather, and clear skies back, at least briefly, I decided to pull out one last ice project for the summer.  This time, I had frozen super strong, rare earth magnets into the ice cubes.  The magnets we used were very small, and would not be good for babies, toddlers, or preschoolers.  I also froze a few ice blocks with regular refrigerator magnets, but they were not strong enough to have any effect on each other through the ice.

My thinking was that the magnets inside the ice would stick the ice cubes together, or push them away from each other, depending on the poles of the magnets inside of them.


It worked too, but only where the magnets met, close to the surface of the ice.


The real fun came when we pulled out our wand magnet, and the girls discovered they could yank the little magnets right out of the ice by passing the wand, in the air, above the cubes.


Then, by placing the wand under the chair (our outdoor play table is still covered in a fortified rock village)...


...they could move the stack of newly freed magnets, using them to push around the ice cubes.


It wasn't exactly the play time I had imagined, but they had a great time with both the magnets and the melting ice, creating mazes, and then bulldozing their way through.


And, it got them back outside for a while.

Thursday, July 24, 2014

Summer Fun 2014 - Building a Da Vinci Style Arched Bridge


Sometime between 1485 and 1487, Leonardo Da Vinci, apparently sketched out designs for several "emergency" bridges.  They were intended for easy construction, using either pre-cut boards, or timber felled as needed, for a quick crossing of obstacles on a military campaign.

Building a model of a Da Vinci inspired bridge out of supplies found from around the house, might sound like a project for the school year, but I'm including it in our summer fun series, because the Da Vinci designs are so simple, building them is more like doing a jigsaw puzzle, than working out an engineering problem.  And, on a too-hot-and-stormy-to-go-outside kind of day, who doesn't like a good puzzle?


Most, if not all, of the Da Vinci bridge models you can buy come with notched planks - one notch right in the middle, and two an equal distance from either end, on the opposite side from the middle notch.

We started out using chopsticks without notches (the step by step building instructions we followed can be found in the resource list at the bottom of the page).  Actually, we started out using sugar cookie sticks...


...but they snapped under the pressure holding the bridge together, so we moved on to chopsticks.  They worked perfectly for small, simple bridges...


...but tended to roll, and come apart as additional levels of planks were added.


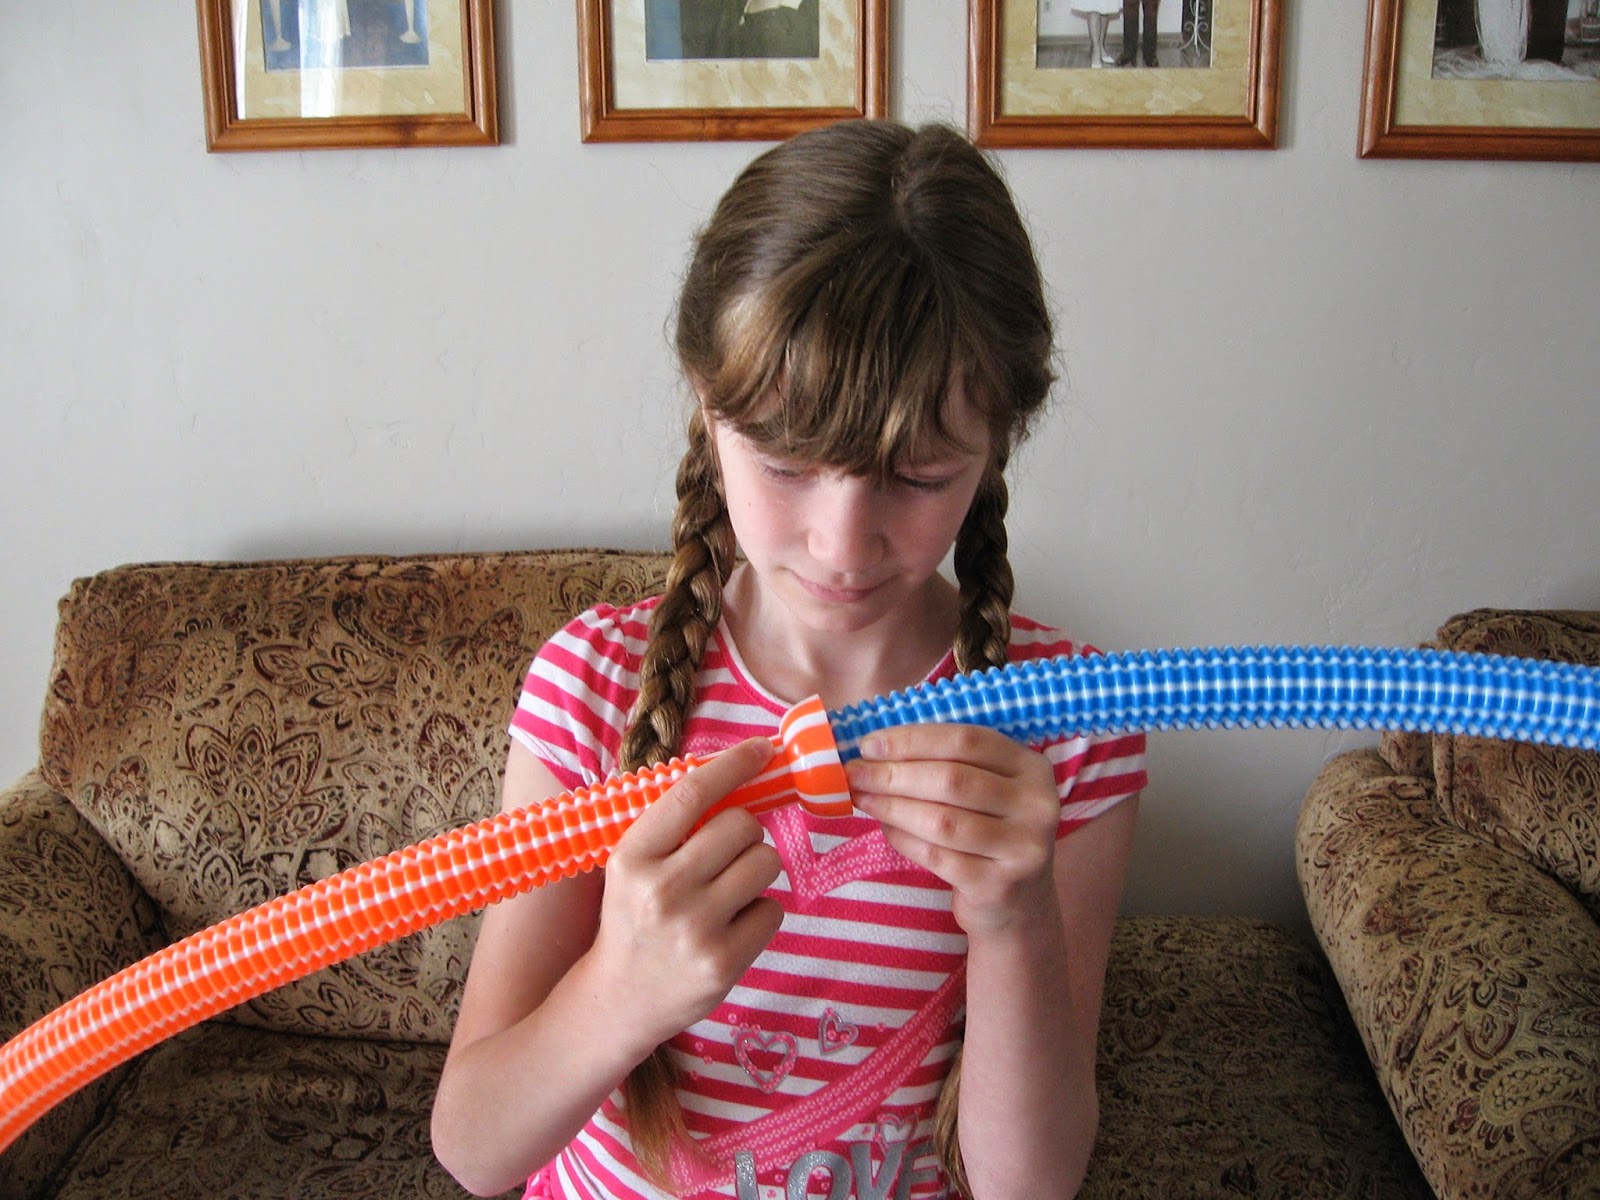
Notching the chopsticks seemed difficult, so we opted to cut notches in drinking straws...


...to use in combination with the sticks.  This worked really well...


...making the building process so much easier, except that as more sticks, and straws were added, the pressure proved to be too much for the straws as well...


...and they started to bend in the same spots where our cookie sticks had broken.  If nothing else, the cookies, and straws served to highlight how the design uses gravity and friction to direct the pressure down, to hold the pieces in place.


Finally we read, that while most of the models come with notched planks, the original sketches actually called for the planks to be lashed together with rope.  I'm not sure if that is correct, because none of our other sources agreed with it, but we tried it anyway...


...tying the chopsticks in place, with short lengths of yarn.


Not only were we able to build the bridge longer, and higher...


...but it was sturdier - if still a little springy.


In fact, successfully testing our bridge with one book, we built on until we had a complete half circle, at which point friction, and gravity started working against, instead of for us.


The taller bridge easily held two semi-heavy, hard back books.  We tried a third book, but the springy bridge sprang back with enough force to knock the books off, and flip the bridge across the room - one of Newton's laws at work, I'm sure.


I can't imagine, that soldiers being flung bridge and all, into a river, would be very happy.  That of course, brought up the question of how you were suppose to get across the bridge, anyway.  My thinking is that Leonardo intended for cross planks to be added to the frame once it was in place, to allow soldiers to march right across.  But then, Barbie might have the right idea, and it might have been intended to work as a sort of arched ladder, more than a bridge.


At any rate, the one thing we did learn, was that in this case, as an architectural engineer, Leonardo Da Vinci was an excellent - artist.

Resources we found helpful:

Katerina Lipertova's Practical Science Activity created by TES Science - includes a video clip of students building various sized Da Vinci bridges, up to some large enough to stand on.

Instructions for Building Leonardo Da Vinci's Self-Supporting Bridge.

Leonardo Da Vinci Inventions from Pathfinder's Education Support - talks about the bridge being lashed together in Da Vinci's original design.

Log Bridges and More - a picture of a similar design, built life-sized, out of logs.

Leonardo's Freestanding Bridge from MJ2 Artisanos - for the idea of the straws.